Wednesday, August 28, 2013

Post Ideas?

Oookay. So, my brains quite blank right now on what to post next. Haha. I've been having a battle with myself on what to post next. A few I have in mind:
  • My Divi buys/goodies (a lot have been expecting a post on it after my WIMB post.) Haha
  • My weekly buys - My and my BabyLove usually go to the mall every Friday for me to get my salary. And, usually, we get a few stuff, both for personal needs and some self-rewards. Do you guys think this is a good post or just something that would bore you? I plan to include mini reviews if necessary. ;)
  • I still have a few makeup product reviews
  • My product empties
Do you guys have any suggestion, aside from those mentioned above. I'd love to hear from you! :)


Cheers!
Pin It Add it to your boards!

Tuesday, August 20, 2013

What's In My Bag [Divisoria Shopping]?

For those who regularly read my blog, you know well how much I love thrift finds. And, going to Divisoria always excites me because I know I will be able to get some things that is more than my money's worth. :)

We went to Divisoria 2 weeks ago (well, not really Divisoria because to my surprise, the building burned down. Yeah, I am late with news because my TV isn't hooked up yet. Haha. So embarassing. You can just imagine my reaction when we got there!), and I was meaning to get this post up the night before. However, I had to get work done that night so that I did not have too much work load by the time we get back. But, I still thought it would be a good post, nevertheless, for those who don't know what to bring if they want to go Divisoria shopping (Well, technically, 168 Mall).

Pictured below is a few of the stuff that's in my bag. I will go through them one by one, beginning with those in the photo. Sorry I wasn't able to number them for easy reference, but, the items below are pretty easy to identify, so I don't think it would be much of a problem. :D


As you guys can see, I am bringing a big tote. If I did not have a little girl with me, it would have been a smaller bag, however, I had to bring along a few other baby stuff, hence, the big tote bag.
  1. Hand Sanitizer (on strap of bag) - 168 Mall is a really big place, and the only rest room I know of is located at the food court.There may be others, but that's the only rest room I am familiar with. So, there is really no access to water to wash hands and sanitize, so the next best thing to bring along is a hand sanitizer, especially I am with my little BabyLove who may touch unsanitary things once in a while. :)
  2. Bag Watch (on strap, beside my hand sanitizer) - Because we were a group, we tend to go separate ways once we get there. So, sometimes, we would just decide on a time we meet up again when we have to get lunch or go home. And because I don't like taking my phone out often when in a crowded place, I find the bag watch very useful to check the time. Plus, I don't have to rummage thru my big bag for my phone just to check the time. 
  3. Tissues - again, for sanitary purposes, especially for wiping off sweat. 
  4. Face Blotting Paper - Aside from sweat, I do like to blot off my slick, oily face. Haha! Though, due to my excitement, I never pulled this out my bag to use. Haha! But, it's still a good thing to take along.
  5. Lipstick/Lipgloss - For touch ups after eating. LoL! 
  6. Face Mist/Spray - It's the little spray bottle right at the bottom of my face blotting papers and lipglosses. It's the Celeteque Face Spray which I transferred to this bottle because the spray of this is better than the product's own. :D
  7. Wallet - need I say more? Haha
  8. Baby/Wet Wipes - Again, for sanitary purposes since access to the rest room is limited.
The following are additional items I brought that are not pictured.
  1. Eco Tote Bags - I mostly accumulated these from SM, and thought this was a wonderful time to re-use them. :D Well, for the first time, we did not need to buy an extra bag at 168 Mall to carry all our items in one place. We usually tend to buy extra BIG bags there to have all the items we bought in one big bag.
  2. Water Bottles - Just like the rest rooms, food stations are also not that many. Unlike the regular mall we know, food kiosks won't be found after every few stalls in 168 Mall, so if you get thirsty, it may take some time before you could buy a drink. It's a good thing to bring a water bottle for that. ;)
  3. Baby stuff like diapers, extra clothes, powder. You never know when the little one needs a change. :D
  4. Small face towel - Sanitary purposes as well. 
Well, that's just about it. I hope this helps and was somehow an interesting read. :D Let me know what you take with you to places like Divi or 168 Mall if you do go there. :) I'd love to know. If not, well, I just hope this was a good read for you or helps you in case you do plan to go.


Cheers!
Pin It Add it to your boards!

Saturday, August 10, 2013

RANT: To Google+ Comments or To Not?

Isn't Google+ Comments driving anyone else cray-cray? Coz', right now, it really is driving me nuts.

I switched to Google+ Comments because I like the look and feel of it. However, just recently, since I got back to blogging, I found it hard to locate the newly-left comments, and it's honestly frustrating. I don't know if it's just me or I just haven't figured it out. It would've been great if I was actually notified that someone commented on my post, and how many comments each post has. But, Google+ Comments, apparently, does not have that feature.

It's really hard to keep track of the comments I receive from the BC Bloggers CommEx. Although I really have no issue whether or not EVERYBODY on the spreadsheet left me a comment, because I firmly believe in the honesty of those bloggers. And yet, we all want to know if someone left a comment right? Plus, I think if you are not a Google+ account holder, I think you can't leave a comment. =/

In this case, I think I will be forced to switch back. I want everyone to have the opportunity to leave their thoughts on my posts, so I think this is the best.

Well, so much for my rant. Share your experiences with Google+ Comments. Do you love it? Do you loathe it like I do? Let me know in the comments below.

EDIT: For those who left their comments via Google+, no worries. I've already seen them and acknowledge. If ever I do miss some, the err is on me. :) I just couldn't take not being notified of new comments. Rest assured, I won't be changing back anytime soon. :)

Cheers!
Pin It Add it to your boards!

Tuesday, August 6, 2013

{Vanity on a Budget} Review: Italia Deluxe 3D Stay On Eyeshadow

Hiya all! 

This has been sitting in my drafts for a while because I always forget to transfer my photos of the swatches. 

I have another review for you guys. Yes, I have been doing so many "beauty product" reviews lately because I have a lot of new things in my hands right now that I want to photograph while I haven't used them a lot yet. :) And besides, why not share my thoughts, right? :)

For this review, I will be sharing my thoughts on the Italia Deluxe 3D Stay On Eyeshadow palette. This palette can be found at Watsons in SM Department Stores on the Beauty Treats counter.

Want a peek at the beautiful colors???
Ain't the colors pretty?
The palette is composed of 8 eyeshadows, 6 matte and 2 shimmery colors.

Left part of the palette are all matte colors - White, Royal Blue-ish, Magenta, Orange

The right side of the palette consists of two shimmers (top row) and two matte (bottom row) - Pink, Olive, Yellow, Maroon
 Aren't the colors simply gorgeous?

It has a little mirror inside, very convenient for travel. :) It also comes with two sponge tip applicators, which I never use. 

This is the front of the package. The top is slightly domed, which I am not much of a fan of because it takes up so much space in my vanity kits.

Back of the palette, containing the ingredients as well as the price tag. This palette only costs 149.00php. 

A more close-up shot of the ingredients.

Packaging:
♥ I found the packaging hard to open. I am afraid that it would just slip out of my hands which may lead to shattering the shadows as I open it.
♥ Also reminds me of those cheap, China-made makeup. Though, I do use some China-made makeup (and, mind you, some of the drugstore cosmetics you buy are manufactured in China) because I really have no bad reaction to it. As for lead content. Yeah, yeah, whatever. There are so many other "harmful elements" around that could endanger our health. :) I will cover my views on China-made makeup in a separate post, maybe. Anyway, thought I'd point this out to those who are concerned about cheap, looking makeup. :)
♥ Domed lid, which I hate because it takes up space that it shouldn't really be taking.

Eyeshadows:
♥ Really good color payoff, with and without a base! Swatches can be seen below.
♥ No pungent smells. I know some eyeshadows do have unnecessary scents. >.<
♥ Does not crease (with primer underneath).
♥ Lasts very long!
♥ Feels so buttery soft on the fingers. Well, I don't know if the "ridges" found on the eyeshadows themselves contribute to that buttery feeling on the fingers. But, I think they apply and blend like a charm!

Okay, now time for some fun swatches!

Left-side shadows - without base.

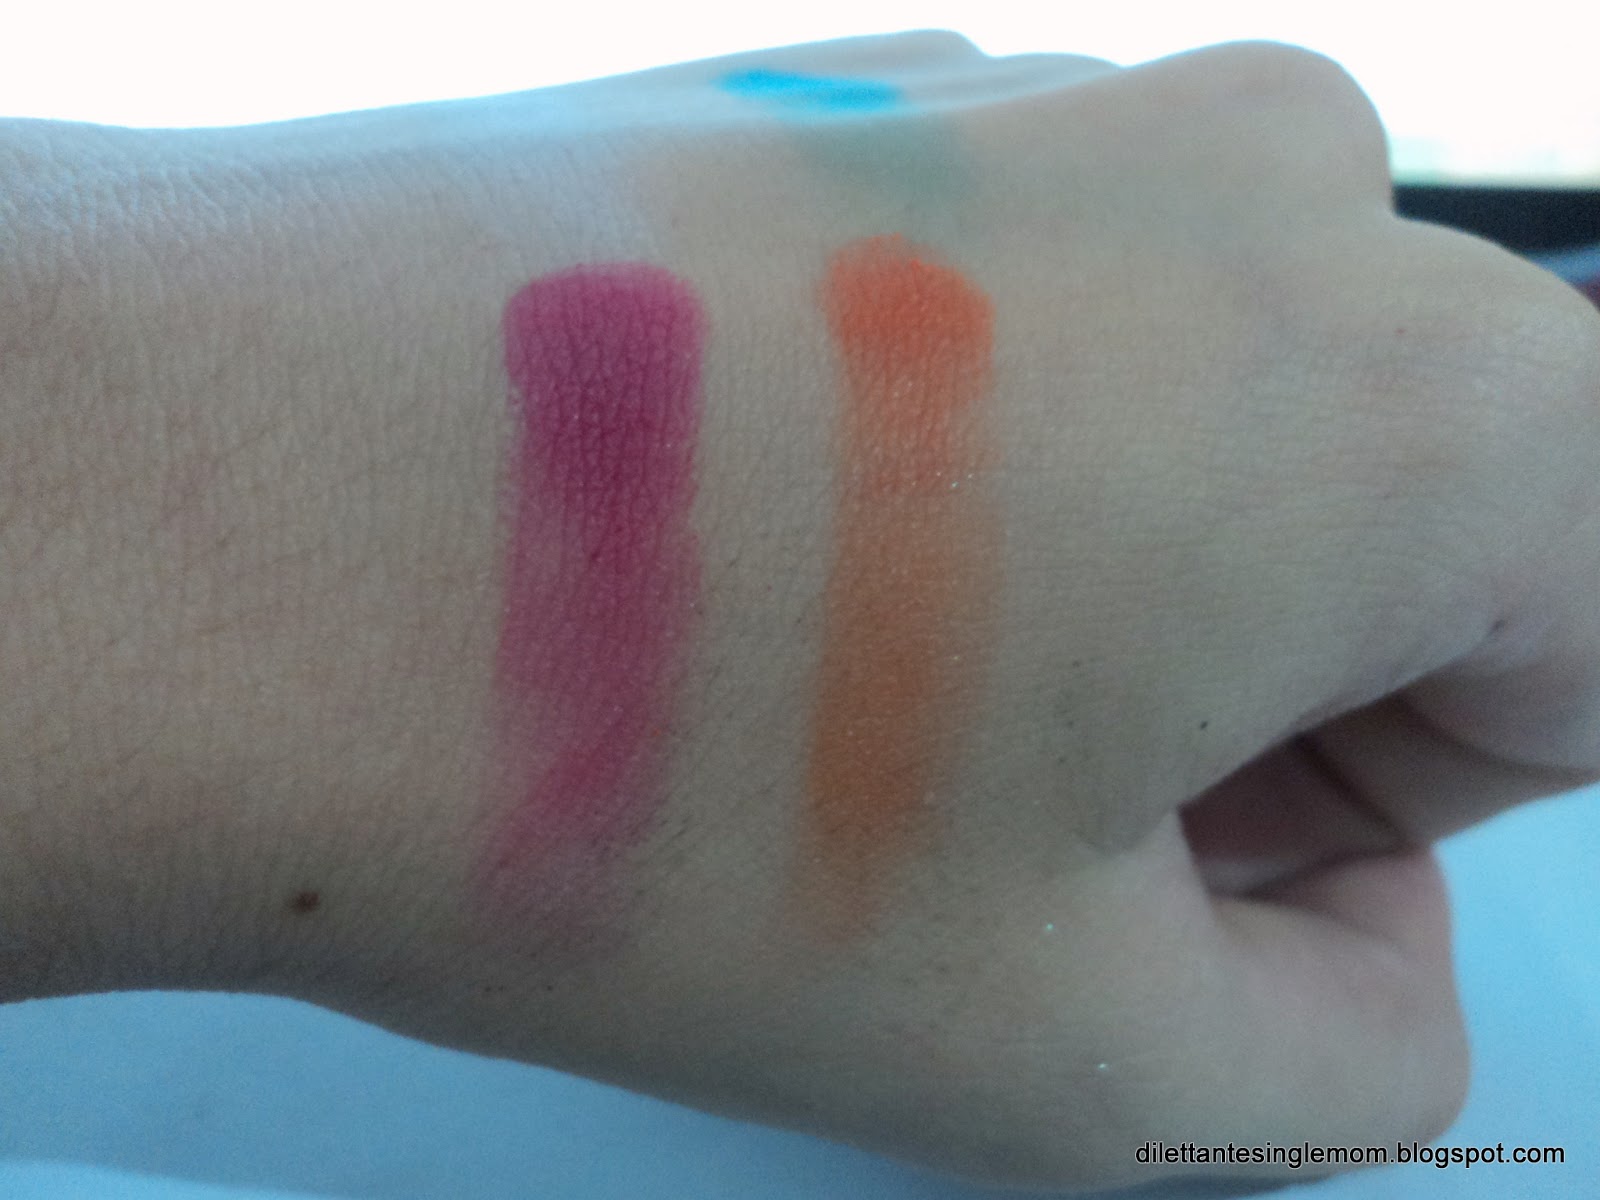
Still left-side, bottom shadows - pink and orange, without base. Both Matte

Left-side, top shadows - white and blue, without base. Both Matte

Right-side, bottom shadows - yellow and red, without base. Both matte. Yellow is quite chalky, but could be smoothened with a little more blending.

Right-side, top shadows - pink and green, without base. The only shimmer shadows. SA said otherwise. Said that the yellow and red were shimmers, but I did not find any shimmer in those two.

Left-side shadows, with base.

Right-side shadows, with base.
I like them all. Only problem I found was the yellow which came out a bit chalky, but could be worked with. :) Otherwise, I am obsessed with these. I find myself grabbing this palette a lot. Haha!

Well, 'til my next review/post!

Cheers!
Pin It Add it to your boards!

Thursday, August 1, 2013

{Vanity on a Budget} Vani-tip of the Day: Waterproof Mascara over Non-Waterproof Mascara?

I love my waterproof mascaras, especially my Maybelline HyperCurl Volum' Express (fat tube). They're the only type of mascaras that hold my curl. I have stick-straight eyelashes and the curl will just drop down once I apply any type of non-waterproof mascara. Plus, non-waterproof mascara NEVER fails to smudge or smear under my eyes, making me look like a raccoon. GUARANTEED!

But, let's face it. Taking off waterproof mascara is really, really, REALLY a challenge. Sometimes, even the best makeup removers won't work with these stubborn lil' babies. Which lead me to Google-ing so many different ways you could actually do to remove them. Some work real well, and some require high-end products just to get them off. Well, I did come across one tip somewhere, but it seems this tip isn't that much shared, so why not spread the word right? This is, by far, the best way I found to take off my waterproof mascara, whatever brand it is.

It all starts with prepping the lashes. Have you ever thought of layering waterproof mascara over non-waterproof? Well, if you haven't, I dare you to try it!

Yes, I know it's an extra step, but, ever since I've tried this technique, I just found removal of waterproof mascara easier by the end of the day! Well, I figured because waterproof mascara is oil-based and clings to the lashes really good, making it hard to get off. And, this may lead to shedding of eyelashes as we try our hardest to get it off.

Non-waterproof mascaras, on the other hand, wash away or melt easily with makeup remover and does not "cling" as much to our lashes as waterproof mascaras do. Well, that's just my own logic, but I did think it made a lot of sense!

Since then, I went out to buy a non-waterproof mascara. You can get the cheapest that you can find, anything at all. I used the Essence Maximum Definition Volume Mascara (orange tube). I decided to get a defining mascara so that my lashes were separated. This mascara did not really add a heavy amount of volume, but it did not matter since my waterproof mascara does that job. So, let's cut to the chase and let me tell you how I do it.

♥ Just like prepping the face with moisturizer and primer before makeup and let it sit while I do my hair, I prep my lashes the same way. I apply the non-waterproof mascara after I apply my moisturizer/primer.
♥ Most important step: Make sure you only apply a thin coat, enough to coat the lashes. What I do is wipe off the excess on the wand on the back of my hand, both the tip and the brush itself. Waste of product you say? Trust me, wiping it on the back off your hand doesn't really affect how fast the product runs out. (More detail on this tip on a future post. Let me know what you think) The reason why we need only a thin coat is so we don't damage our lashes once we get to curling them later on. They won't get all crunchy because we are just simply creating a "base" for waterproof mascara.
♥ Unlike applying your fave mascara, I do not wiggle the wand back and forth. I simply just glide it from root to tip, again, to ensure we don't get much product on our lashes.
♥ Let sit until dry, and continue with the rest of the makeup. It should be dry by the time you curl your lashes (be gentle, still, when curling to avoid shedding).

And that's it. I did not mean for this "tip" to be so length-y. But, I thought it was best to explain the concept of it instead of just providing the steps. This may not work for everyone, and some may not even approve of the curling with mascara on, so no big deal if it's not your thing. :) As they say, there really is no right or wrong with makeup. Go with whatever works for you and work 'em lashes!

Let me know what you think in the comments below!

Cheers!


Pin It Add it to your boards!

Tuesday, July 30, 2013

{Vanity on a Budget} Review: ELF Brightening Eye Color

Hiya ladies!

I am back with another Vanity on a Budget post, and today on the spotlight is the ELF Brightening Eye Color eyeshadow palette. These are just two of the things I got for my birthday goodies which I talked about in this post.

ELF Brightening Eye Color in Luxe (left) and Ocean Dreams (right); 129.75php
Without further ado, let's get on with the review, shall we? :)

**Warning: I am no professional beauty blogger nor photographer. I will try my best to give as much detail as I can, but if I lack the skills of doing reviews, please bear with me.**

**Disclaimer: Colors of the products in the photos may vary from the actual item. I suggest that you check them out personally at the counters and test them out if they have samples available. :) **


I got two of them, Luxe and Ocean Dreams. Luxe is more of a reddish golden palette, while Ocean Dreams (from the name itself) is of blue tones.

Product Description and Directions for Use
Price and Ingredients
Unopened
Ocean Dreams Palette

Back has palette name

Luxe

Back of Luxe palette
Okay, enough of the packaging photos. I'm pretty sure you are excited by now for the most important part of the review - SWATCHES!
Ocean Dreams Palette. Top-No base; Bottom-With base. Swatched with one swipe.
 The reason I got the Ocean Dreams Palette is because I do not have a navy eyeshadow color yet in my stash. So, I decided to pick this up. I went through a couple of brands before I landed with this (glad I saw this!). The other navy colors I swatched had too much glitter in them, and since I will be using the navy for the crease and outer edge, I wanted the least amount of shimmer I could find. I was going for a single eyeshadow (was eyeing for Essence), but when I found this, why not pick up a palette which has 4 colors total? Definitely a great steal!

Anyhooo. Let's get on with the swatches. I LOVE all the colors. Reminds me of the ocean, indeed, and I think would be a great palette to take along during the summer. But, it can be adapted to other seasons depending on how you pair each shadow.

I am no good with color descriptions, I will try my best to describe each color. First is very pale aquamarine color. Second color is somewhat Turquoise-ish. Third and fourth are two different shades of navy, the 4th color having a more purple undertone to it. First and second colors are quite shimmery, while the 3rd and 4th have very little amount of shimmer. I would say semi-matte.

As you can see, they go on better with a base. I know the bottom is a little blurry, but judging from the last two dark, navy colors, the color payoff wasn't great without the base. They faded out towards the end of each swatch. So, I definitely recommend you use a base such as primer or concealer prior to application for the best color payoff and to ensure your shadows last all day long!

Luxe Palette: Top-No Base; Bottom-With Base
Color Descriptions: Pale Gold, Burgundy-ish or Maroon, Antique Gold, Copper-y Bronze. All colors are shimmery, and more shimmery than the Ocean Dreams palette.

I got the Luxe palette mainly for the burgundy-ish color. It may be quite light, but it can be darkened a little more with black or dark brown. ;)

What I love:
♥ Very pigmented (except for the two navy colors)
♥ In my experience, ELF eyeshadows never creased on me (I always wear primer though)
♥ Very affordable! Just 129.75php for a pop!
♥ Easy to carry and lightweight
♥ Colors are very blendable and buildable
♥ 4 colors in one palette! You can use them individually and mix and match with your other eyeshadows.
♥ I love that the name of the palette can be found at the bottom/back of the palette. Although I don't do FOTD's and tutorials, sometimes people ask what palette it is and it's a bummer when you can't find the name anywhere on the product's packaging. ELF does have products that don't have the name on the packaging.

What I loathe:
♥ None, really, except for the two navy colors. I am just hoping I got a bad one. But, I can work with it anyway. :)

Will I repurchase? Absolutely! Although it may take a while before I get to use them all up, but I would definitely when I run out! :D

Please don't mind the automatic watermark Blogger/Google placed on my photos. It  would've been fine if it wasn't the other blog link it put on them (Thrifty Crafty Things is my craft blog). I still have this to figure out, so if anyone has any idea how I could change or remove them, it would be highly appreciated.

I hope I covered everything there is to say for a review. Please let me know in the comments below your thoughts about this! :) I would definitely love to hear from you guys for me to improve. I will be explaining on a separate post why I decided to make reviews and all that jazz. But for now, I bid you adieu.

Cheers!


DISCLAIMER: I wasn't paid to make this review. All products mentioned are purchased with my own money. ;) Pin It Add it to your boards!

Saturday, July 27, 2013

{Vanity on a Budget} My Birthday Goodies - Drugstore Products!

Hiya all!

I'm back with a birthday post! Yay! I am so excited to share what I got myself for my birthday. :) I usually don't go out and shop "one-time-big-time" for makeup products, but I promised myself to go, for at least one (and very first!) time for some makeup shopping! I saved up for it until my birthday and shopped my heart out (well, still on a budget. Hihi).

I did not call it a haul because, it ain't really a haul. Besides, the real meaning of haul is some stuff obtained illegally or things you dragged. O.o Although I know it's a term in the "beauty world" and I am not against those who use the term as well, but I just couldn't find myself to call it a haul. So, I called it goodies instead. :)

So, here is a photo of all the things I got. A couple, though, I wasn't able to get a photo of. But, we'll get to that later. :)


Excuse the poor quality of the photo. This was taken with just my tablet camera and it's not the best. I was just too excited and grabbed the nearest camera that I have. LoL. Anyway, I will go more into detailed photos of some since I will be making a review on a couple.

From left to right: Sakura Bella Travel/Gift Pack from Watsons (Shower Gel, Body Scrub, Hand & Body Lotion/99.00php); Italia Deluxe 3D Stay-On Eyeshadow (149.00php); Fashion21 Aqualicious Lipstick in Deep Sea (~150.00php);  Essence Stay All Day Long Lasting Eyeshadow in 09 For Fairies (209.00php); Pinkies Collection Single Eyeshadow in Skin(? I think/~70php); Shawill Makeup Brushes (Flat Eyeshadow Brush, Thin Eyeliner Brush, Lip/Small Eyeshadow Brush/99.00php); ELF Brightening Eye Color in Luxe and Ocean Dreams; FS Cosmetics Eyelash Curler (125.00php)

A couple of other things I got was some bandeaus from Genevieve, 4 for 100php, a tablet sleeve (180php) and universal gadget stand (60php), both from CD-R King.

All in all, I only spent 1,500php for everything. Not bad, right? I was pretty darn happy to actually go out at least for once to shop makeup! :)

A few notes:
♥ The travel pack, I bought because I wanted to try them out first if they were nice before buying the full sized product. This is a great tip for those who want to actually try something before getting the full-sized product. ;) Though, not all variants have this travel pack, at least here at SM Clark.
♥ My Essence Stay All Day Eyeshadow, I was quite disappointed with because it kinda dried up. You can't even check it in store because the price was in between the cover and jar itself. But, I still manage to make it work. I guess I just have to use it more often.
♥ I couldn't make a review of the Aqualicious lipstick because I gave it to my cousin as a gift. :D

As mentioned, I will be making a review for a couple of the items, so let me know what you think about it and if you do want to see the reviews. :)

Cheers!


Pin It Add it to your boards!

Sunday, July 7, 2013

Thrift Finds At Marquee Mall

Who doesn't love sales? Well, I most certainly do, and I feel so happy and accomplished when I could get stuff I want for discount prices.

For those of you who do not know, Marquee mall is located here in Pampanga which is owned by Ayala, and can be found at the NLEX Angeles Exit. And, they always have sales (sometimes I feel they have sales every month) and, when they do go on sale, items are really marked down, even to as much as 75% or more! Unlike other malls who mark down just about 10%. Really?!

Well, anyway, I just want to sure a couple of my thrift finds, both sale items and non-sale. Either way, they still have really low prices compared to other shopping malls/department stores.


My little 'haul', as they say.


A cool digital bag watch. Regular price (RP): ~150php; Sale price (SP): 79php


Zipper purses/pencil cases (given by my Aunt). RP: 59php; SP: 10php


Oh My Golly (OMG) Crystal Sand Nail Polish in Emerald and Indian Red - 18php each, Not on Sale


2 sets of Sassy elastic headbands. 49php per bundle/set, Not on Sale


Bath headband. ~30php, Not on Sale


Fanny Serrano Eyelash Curler. ~130php, Not on Sale


Fanny Serrano Eyelash Curler Refills. ~45php, Not on Sale


Shoelaces which I will use for a DIY project that is long overdue. ~30php/pair

There ya go. Just a couple of items that I don't usually see at SM Clark. Marquee mall is quite far, so I only get to go there very rarely.

How about you? Do you love thrift finds. Share them in the comments below. Pin It Add it to your boards!

Tuesday, July 2, 2013

{Vanity and Me} ELF Eyebrow Stencil Kit + Official ELF Online Shop Review

Hello everybody! So, I am starting another new blog series - Vanity and Me. I was actually planning on making a separate blog for it, but come to think of it, I am really not in the "professional world" or make up blogging. I mean, I don't really go out to buy products I don't need just to make a review of it. So, I decided to just add another section to my blog since this will be more of an occasional thing, though I love makeup so much. :D

Anyhoooo...

For the first post on this series, I will be reviewing the ELF Eyebrow Stencils and the website itself. If you are just like me who find shaping their brows consuming half of your make-up time just like me, then this post must be for you. LoL.

** I would like to warn you that I am no professional makeup product reviewer, so please spare me to rude comments. I am all in with constructive criticism, but if you are here to bash me with rude comments, just leave. :D Plus, this is my first time. Hopefully, I will get better in time. **
Shipped with tissue paper (inside the LBC packaging of course. LoL) The ELF sticker is actually just a cheap looking sticker that you could get done on an internet cafe. O.o Even I could make my own, even better.

It came wrapped in bubble wrap with this little thank you card from the ELF Team.
From top to bottom: Soft Arch, Structured Arch, Curved Arch, and Full Arch.

Product description found on the back of the packaging:

Achieve perfectly shaped brows to accentuate your face. The reusable stencils is easy to use and with 4 stencils: Curved Arch, Soft Arch, Structured Arch and Full Arch to choose from, it makes these brow stencils suitable for all brow shapes. Now your brows can look picture perfect everyday!


The stencils are made of  plastic they call PVC, I think? You know those gradeschoolers use as plastic envelopes? These are the same material, only a bit thicker in my opinion.

To use, you basically choose the stencil that works best for your brow shape, and simply line it up with the start, arch and tail of your brow, and simply fill in with brow powder or pencil.

Pros:

  • Very affordable, only Php129.75
  • They are indeed reusable and quite sturdy for the price and material.
  • Putting on my eyebrows is such a breeze! (Though it takes a couple of practices to get used to)

Cons:

  • I only found mine on the online store/website of ELF Philippines. Not sure if this is available at the stalls at some branches, but here at SM Clark, they are not.
  • ELF Team took a loooooong time to deliver my item (will go into detail on this below)
  • The stencils are not labeled according to the type of brow it is, so you have to match it with the photo on the front of the packaging (which is not easy, I tell ya!)
  • Poor packaging. I was expecting it to be like those from the Original ELF products
Overall, despite more Cons than Pros, I still like my stencils. Putting on my brows definitely takes a lot faster now. :) Plus, it's by far the cheapest stencil I found. Though I don't own any other or seen other brands, they do say that some stencils cost more than 1k! I am not willing to shed out that much for just a couple of stencils. O.o 

Now, for a short review of the website. As mentioned, I got mine from ELF Philippines website. It took a while for them to arrive. In fact, I ordered from them first a day before I ordered some products from another company (online, as well). And, guess how long I waited ---- 3 LONG WEEKS! For just some stencils, I think it wasn't worth the wait and trouble. Being a consumer, of course, it scares us when we don't receive our package in time, thinking the sellers ran off with our hard-earned money. And, I love ELF and all their products, but then, I am not really impress


Cheers!
Pin It Add it to your boards!

Friday, June 28, 2013

Testing, Testing BlogIt App

Finally!!!! An app for Blogspot that works on my tablet. A shout out and big thank you to Mommy Hanny! Can't wait to get back to regular blogging. It's like my social life is sooooo lacking right now. Not to mention, I might start over again to get the interest of my viewers again. Whew! Pin It Add it to your boards!

Blog Awards